# Invoices
# Invoice List
The accounting - invoice list (opens new window) page shows all the current invoices available for your business. You can see the details of the invoice, and status from this page.
Invoices are grouped into:
- New Invoices
- Overdue Invoices
- Recurring Invoices
- 3 Months Paid
- 12 months paid
- Over 12 months paid invoices
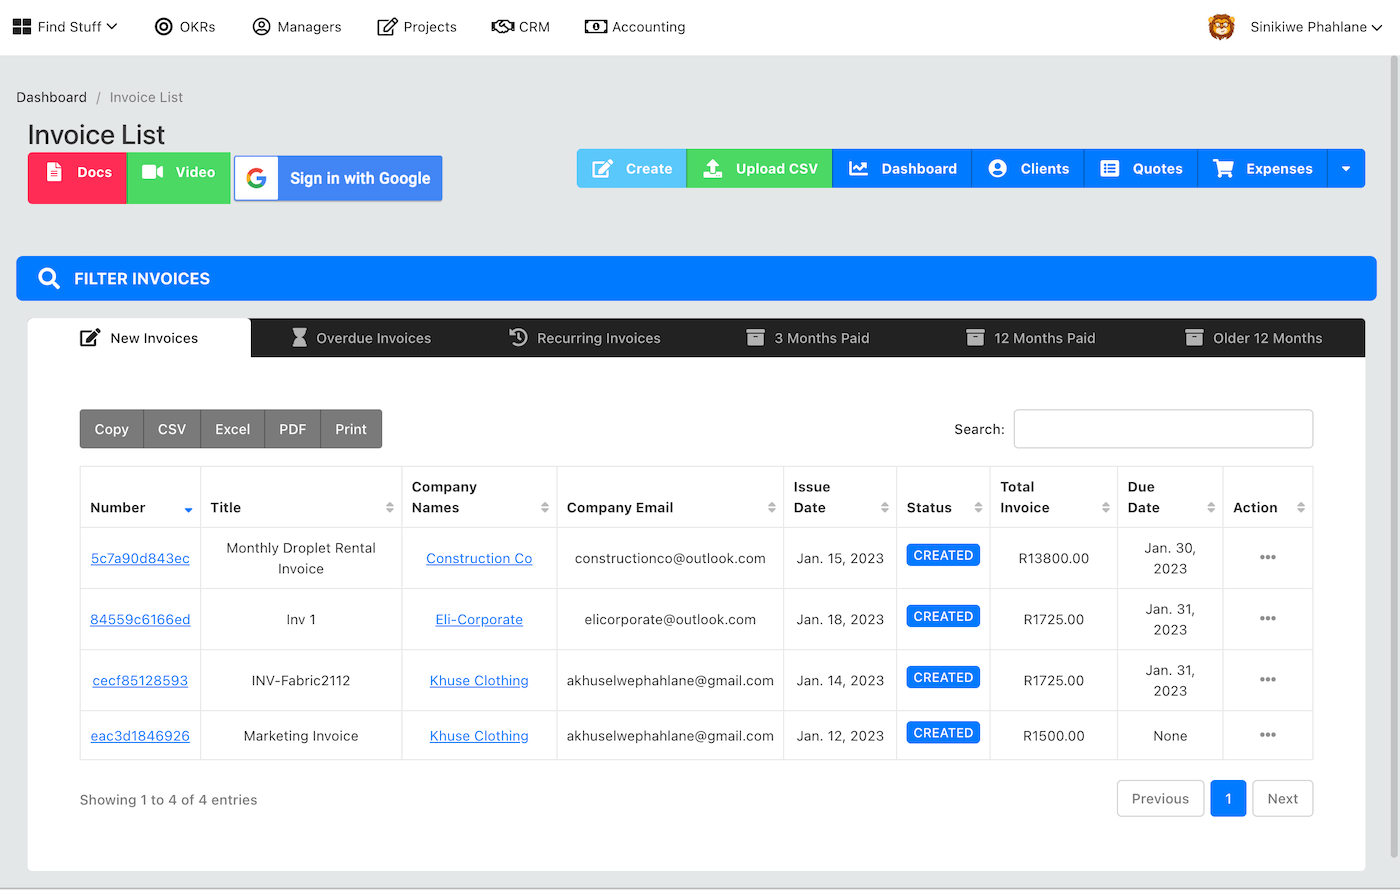
At the top of the page, you can click on the "Add New Invoice" button to add a new invoice.
# Add New Invoice
When you click on the "Create" button, a new black invoice instance is created, you need to build the invoice objects one at a time to populate the invoice.
TIP
The date created is automatically set to be the current date, if you want to change it click on the edit date button, pick the date you want, then save.
# Add invoice Line Items
Click on the add invoice like items at the top of the page to add line items to the invoice. A new pop-up form will appear - you can now add products and services as line items to the invoice:

You have an option to select from existing products and services, or add new products and services. When you add a new product/service - it will be available to select from in future invoices.
You must enter:
- Title of the line item
- Price
- Quantity
You will now see more of the form, you can continue to add line items as described above or continue with adding a new client to the form.
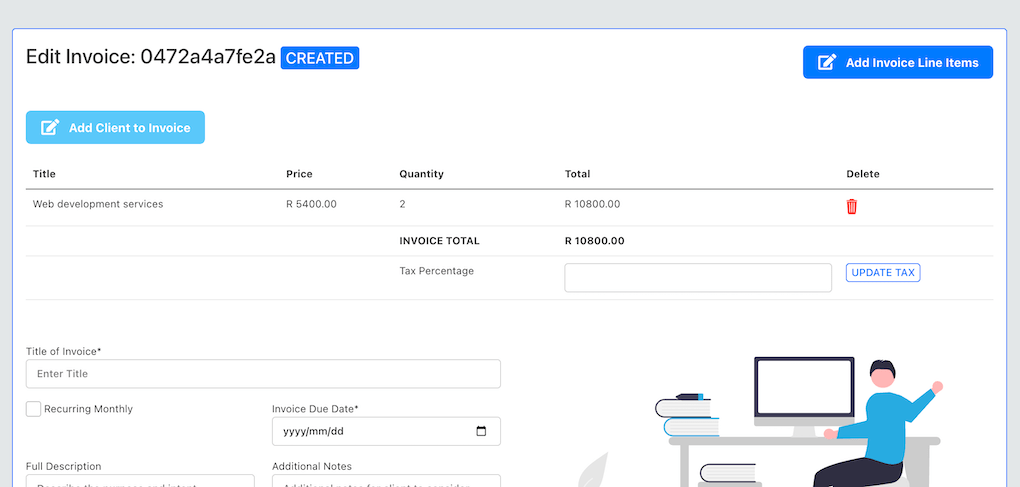
# Add A Client
Click on the "add client button" on the top left side of the page to add a new client.
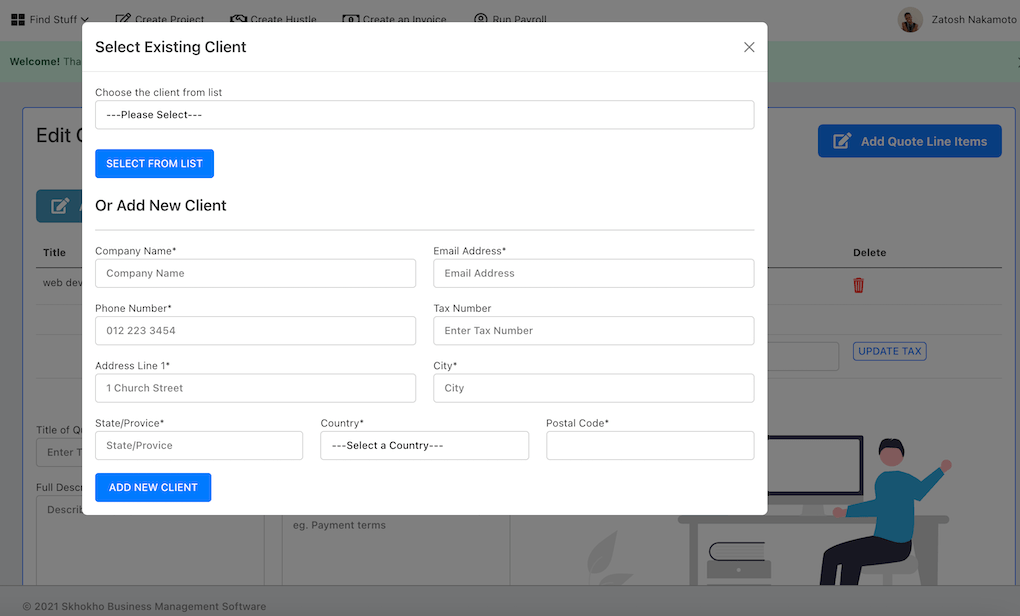
A pop up form will appear, you have two options at this stage:
- Chose an existing client from the dropdown list
- Add completely new client
To add a new client enter the following information:
| Form Fields |
|---|
| Company Name |
| Email Address |
| Phone Number |
| Tax Number |
| Address line 1 |
| City |
| Province |
| Country |
| Postal Code |
Once you enter the client details, you will see them reflected back on the invoice. In addition you will see your own company details.
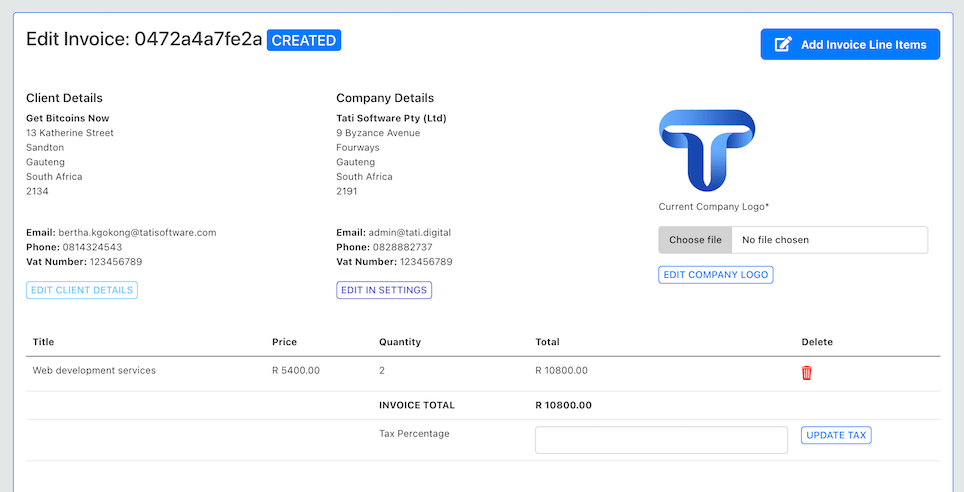
There are buttons to allow you to edit any of the information on the invoice at this stage, including the company logo.
TIP
The Company information shown is set-up in the accounting settings page
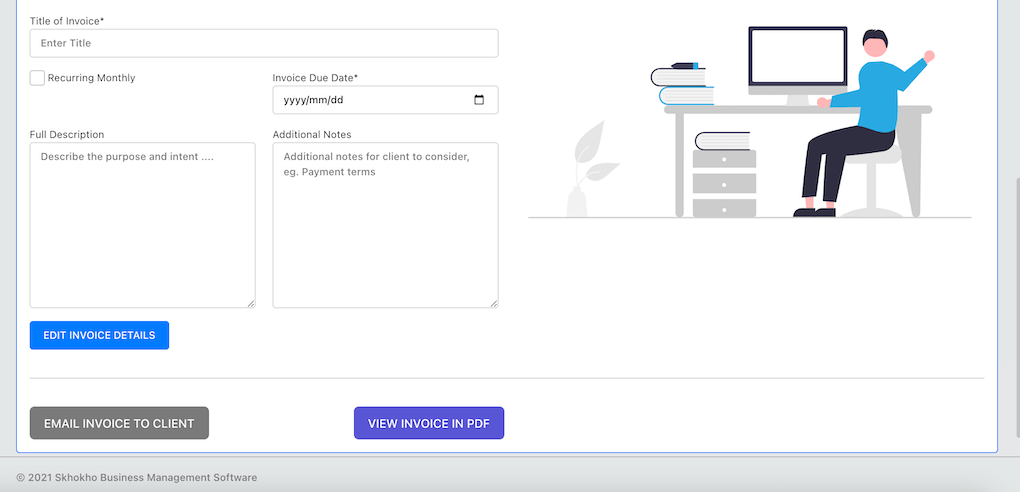
# Edit Invoice Details
At this stage, you can edit the remaining details for the invoice. You can enter the following:
- Title of the invoice
- Check whether it is a recurring invoice
- Due date for the invoice
- Description of the invoice
- Additional Notes
# Assign invoice to project
You can also assign specific invoices to projects. This is recommended if the invoice belongs to a project, the revenue collected from the invoice will be added to the client and project lifetime value, to help the organisation calculate the value of clients and projects.
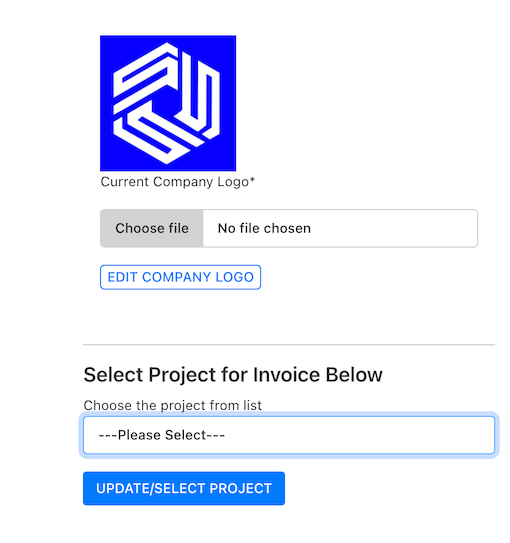
If you have not entered a project yet in the system, enter it first - then return to assign the invoice to it.
# Invoice Actions
You can either:
- View invoice PDF
- Email invoice to client
TIP
When you email to client, the contact details provided for the client on the form will be used to send the email. The client will receive the invoice as an attachment to an email with your contact details to follow up.
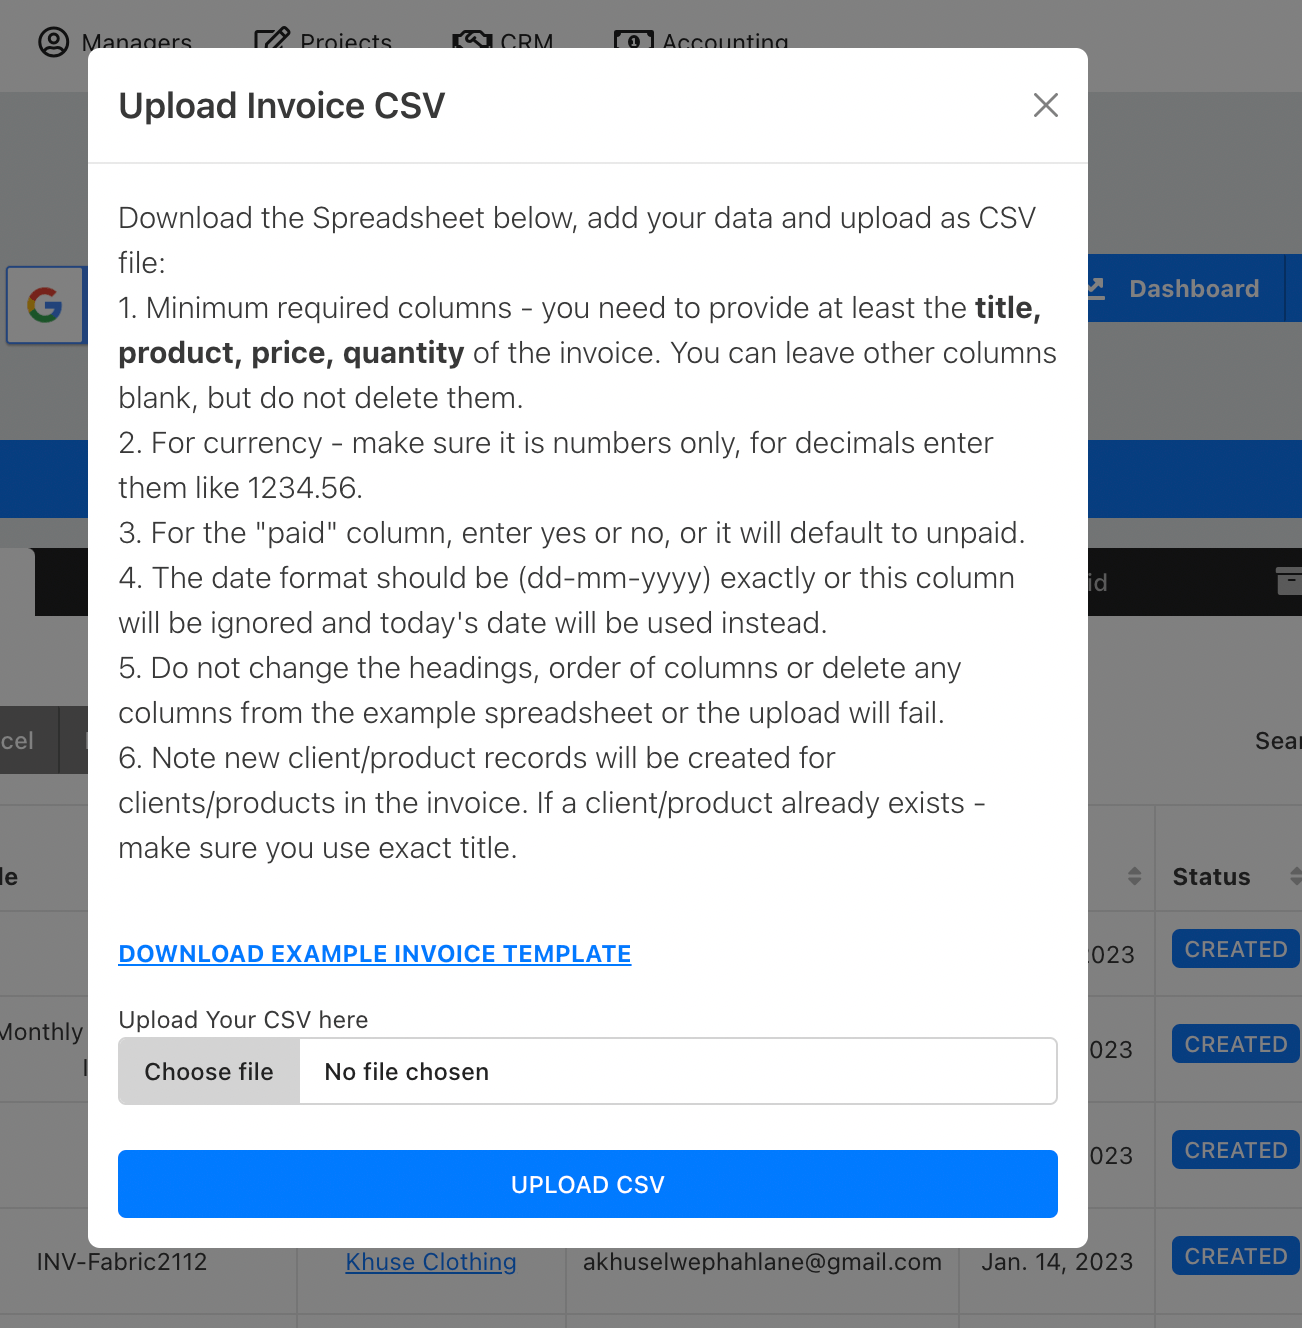
# Upload CSV File
To upload a CSV file with a list of invoices, click on the "Upload CSV" button. Then Download the Spreadsheet example provided, add your data and upload as CSV file.
Before you upload a CSV file, you need to take note of the following specifications:
- Minimum required columns - you need to provide at least the title, product, price, quantity of the invoice. You can leave other columns blank, but do not delete them.
- For currency - make sure it is numbers only, for decimals enter them like 1234.56.
- For the "paid" column, enter yes or no, or it will default to unpaid.
- The date format should be (dd-mm-yyyy) exactly or this column will be ignored and today's date will be used instead.
- Do not change the headings, order of columns or delete any columns from the example spreadsheet or the upload will fail.
- Note new client/product records will be created for clients/products in the invoice. If a client/product already exists - make sure you use exact title.