# Company Settings
Company Settings is divided in to two tabs:

In this page you should be able to do the following things:
- Update your Company details - company name, tax number and other details
- Inviting new members to your company space.
# Edit Company Settings
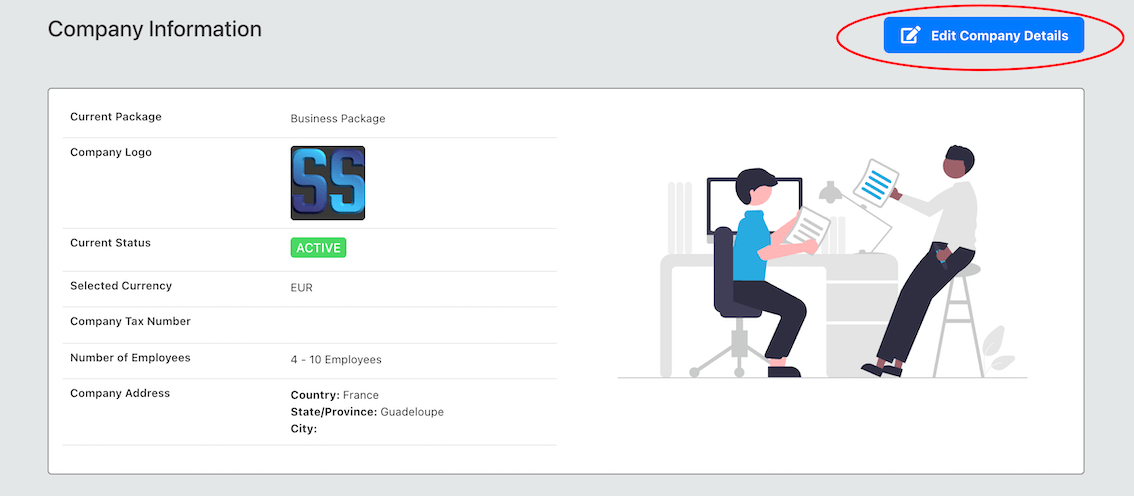
To edit company settings, in the company settings page - go to the first tab, as shown above. Click on the "Edit Company" button.
You will be routed to a separate edit page, where you can change the information as required:
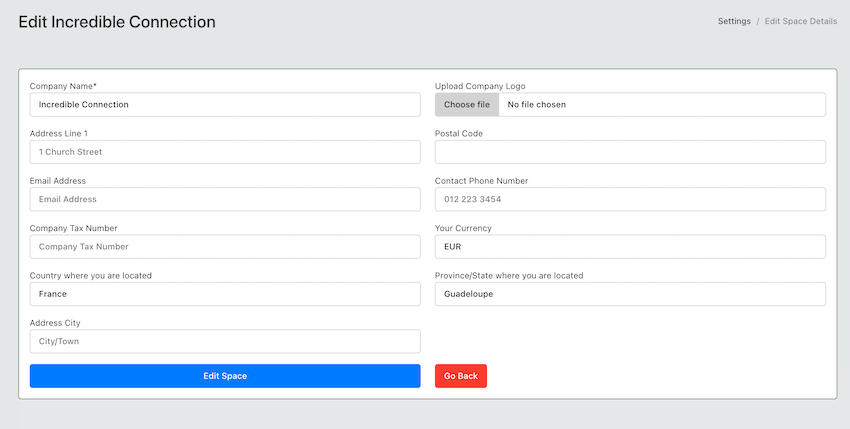
When you finish editing the information, save the form and you will be routed back to the settings page.
# Subscription Details
Skhokho has a tiered subscription model that allows you to select the correct application features for your business and pay for them with a flexible per-user basis. We charge according the number of members you have on your package, and for the package features you have selected.
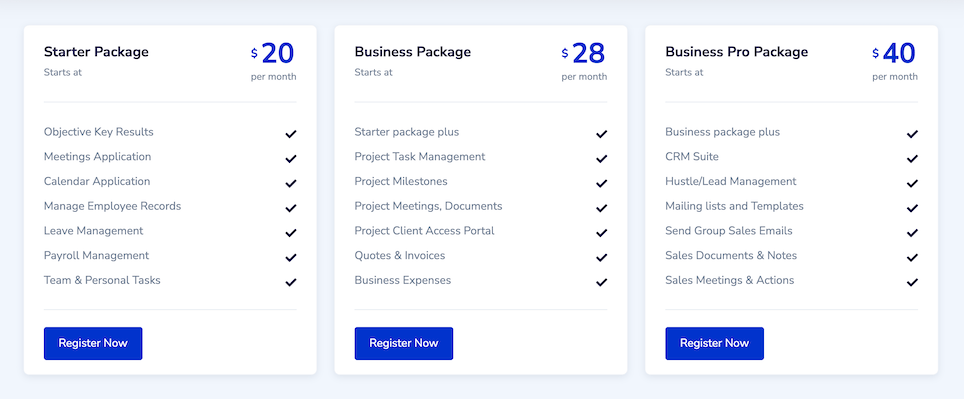
The three packages we have on Skhokho are:
# Starter package
Includes (1) Objective Key Results, (2) Personal Task Management, (3) Calendar Application, (4) HR Records, Leave Management and Payroll, (5) Meeting Application
# Business Package
Includes everything in the starter package, plus (1) Project task management, (2) Project milestones, (3) Project meetings and documents, (4) Client access portal - to stay up to date with project milestones, meetings and documents, (5) Quotes and Invoices, (6) Business Expense tracking and other accounting functions.
# Business Pro package
Includes everything in Business App plus (1) Sales and CRM suite, (2) Hustle/Lead management, (3) Mailing lists and templates, (4) Sales documents, meetings, notes and documents.
Therefore you pay for only what you need, and you can change between packages as required. This settings page allows for just that, changing between packages. You will be charged a higher price when you upgrade from a lower to higher package. Note if you would like to use Skhokho for Billing and Invoicing clients (opens new window), you will need to select the Business Package or Business Pro.
# Skhokho Pricing
User tiers are priced as follows:
| Number of Employees | Starter Package | Business Package | Business Pro Package |
|---|---|---|---|
| 1 - 3 Employees | USD 20 | USD 28 | USD 40 |
| 4 - 10 Employees | USD 45 | USD 63 | USD 90 |
| 11 - 20 Employees | USD 107 | USD 150 | USD 215 |
| 21 - 50 Employees | USD 248 | USD 347 | USD 497 |
| 51 - 100 Employees | USD 457 | USD 640 | USD 915 |
| 101 - 200 Employees | USD 750 | USD 1050 | USD 1500 |
| 201 + Employees | Please Contact | Please Contact | Please Contact |
All prices are payable monthly and can be changed without notice, based on business requirements. Please check this page regularly to check the latest prices.
# Updating Your Skhokho Package
To update your package, navigate to the billing page (opens new window) and review your subscription.
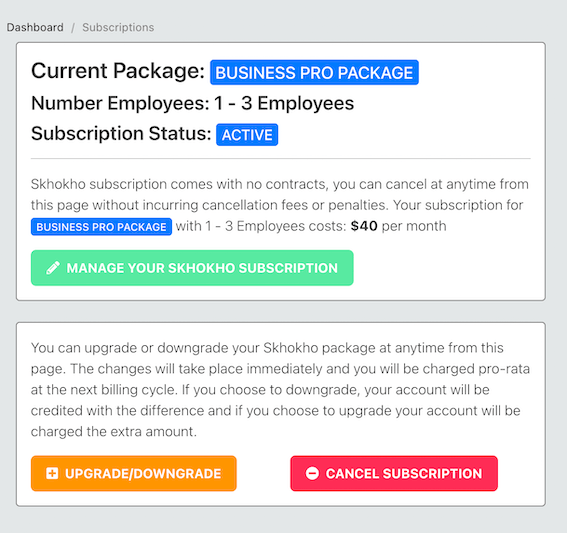
You can choose to:
- Manage your subscription
- Upgrade or downgrade your subscription
- Cancel your subscription
# Manage your subscription
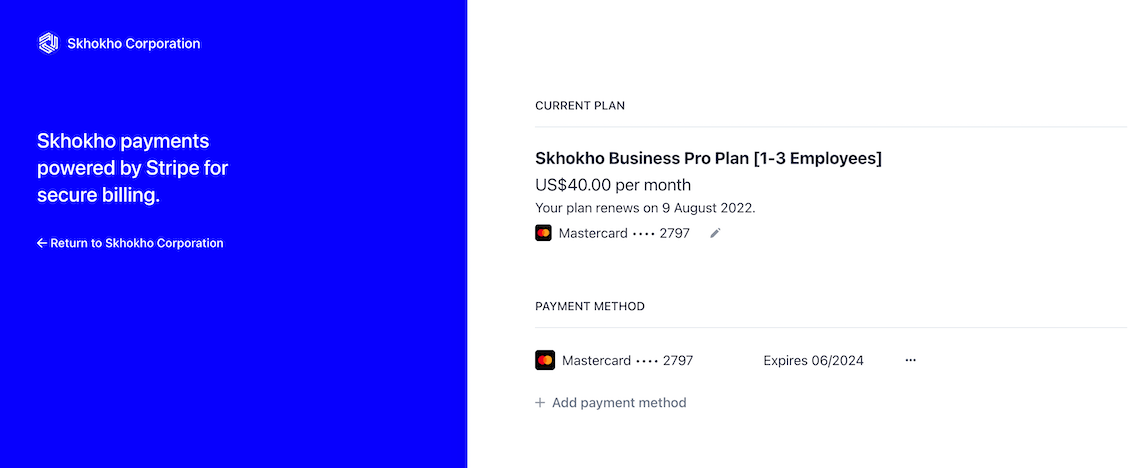
If you click the first "Manage your subscription" button. You will be routed to a secure Stripe Hosted subscription page. Here you can update your payment details, you can see when your next bill will come through and much more.
# Update your package
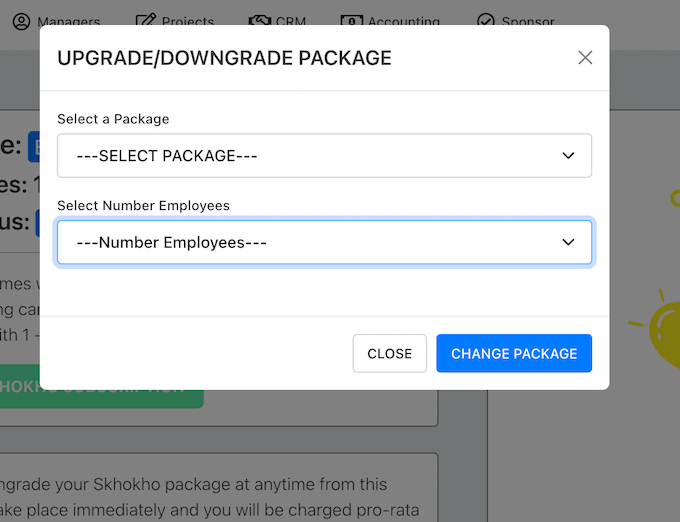
When you click on the "UPGRADE/DOWNGRADE", you can select a different package and number of employees from the dropdown list. Your subscription will then be updated to reflect the changes and you will be billed accordingly.
# Cancel your subscription
You can cancel your subscription at any time without incurring any penalties. You will be able to use the software until the end of the subscription period after which, you will no longer be able to access the platform.
# Add New Members to Company
Based on the pricing above, and the number of employees you have selected. You can then add these employees directly from your settings page. Go to the third panel and you will see all the current members, pending invites and a button to add new members. You will also see the current allowance of members, based on your selection.
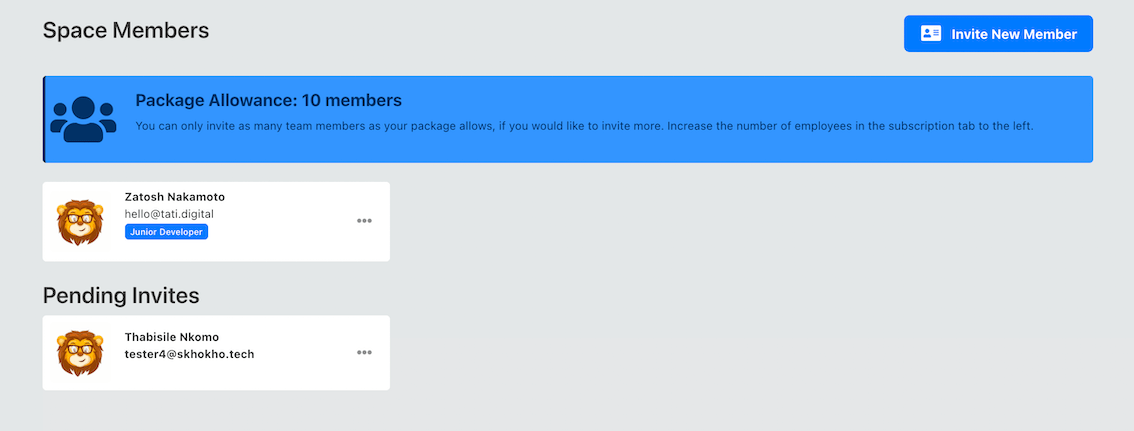
When you click on the "Invite New Member Button" You will be able to add the names, email and job title of the member you are inviting.
TIP
Very important to note at this stage is to select the right line manager for the member you are inviting. The line manager should already have been invited and have "Manager App" access
The Invite Member form looks like so:

At the bottom of the form you can see all the access rights that are possible. These will depend on the package you have selected. Your organisation can have Sales App access, but you grant that permission to only a few people who work with sales. Same applies for Project App and Accounting. Accounting and Project App can only be accesses from Tier 3 - Business Package, while Sales App access can only be accessed from Tier 3 - Business Pro Package. All accounts have Manager and HR App access, as these are included in the Starter Package or Tier 1. However, when you send the invite, only Grant HR App Access to your HR Manager, or the person in your organisation who will deal with HR. As HR access allows the person who has it to view HR files of employees, Payslips and Leave records.
WARNING
Anyone grated HR App access can view employee records, payslips and leave records. They can also adjust the HR settings of your organisation, including pay-date and execute payroll runs.
Also take special precaution when selecting Manager App access, users with Manager App, have the same ability as the company owner to invite members to the platform. However all members they invite will be reporting to them. See more in the manager App Documentation.
DANGER
Manager App access can grant the owner permission to invite new members to the company space.
# Organisational Structure
Skhokho Business Management Software was designed to operate like a business, allow managers and owners to run their businesses more efficiently. Therefore, the business org structure is built in to the app design. The Business Owner, assumed to be the individual who created the space - will have full access. This cannot be changed at a later stage. That business owner can then invite members to join, and grant then access accordingly.
Ideally, depending on the role a members has - access rights should be granted accordingly.
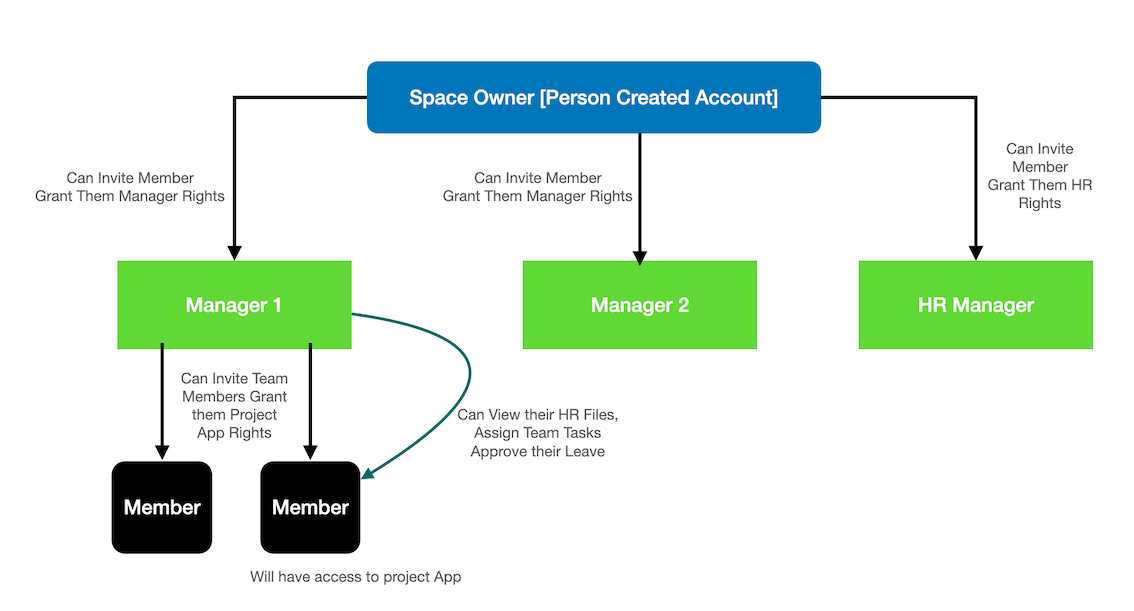 Every member that is invited, requires a line manager to be assigned to them. Initially, the owner can select themselves as line managers - when inviting the top-level managers. These managers will then be able to invite their own team members, or the owner can do it. When they invite a team member - they must select themselves as line managers for these team members.
Line Managers must have Manager Rights, in order to allow them to effectively manager their teams, assign tasks and approve leave.