
# Mailing Lists
You can send newsletter emails directly from your Skhokho Dashboard, for sales and marketing. Email newsletters are known to be one of the most efficient way to send targeted campaigns at a group of people. With Skhokho we give you the ability to send out group emails, to grow your small business.
# Skhokho Philosophy
At Skhokho we believe in simple is best, the group emails sent out will be HTML format, but look like emails that come directly from your inbox. You will be able to enter your own SMTP settings, so that you can send emails directly from your email provider and communicate with your clients on a personal level.
Our group email system is designed to look natural and personal.
# Get Started
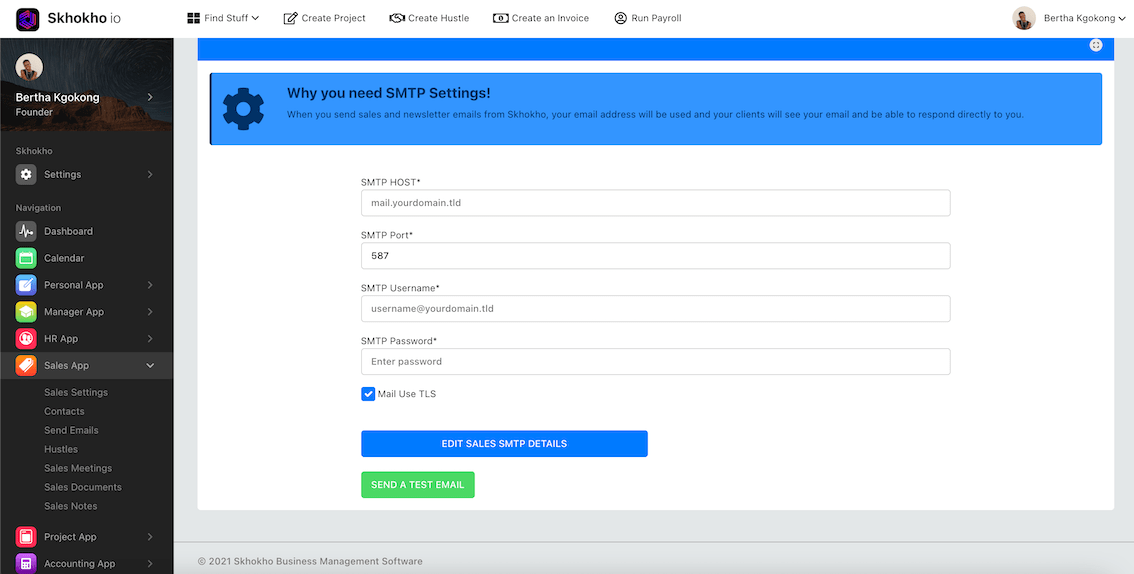
To get started with sending group emails, you need SMTP settings for your email provider. You can get an email account, with your own domain from domains.co.za here (opens new window).
You will need the following:
| Requirements | Example |
|---|---|
| SMTP Host | mail.domain.co.za |
| SMTP PORT | 587 |
| SMTP username | name@email.com |
| SMTP password | *********** |
These are the same email settings you would use to set-up your mail client. Speak to your IT department for assistance if you are struggling to obtain the above information.
TIP
You will need access to the Sales App to use the mailing functionality
# Save your Sales SMTP Settings
Go to the SMTP Settings page in your Sales CRM App here (opens new window). When here you can then enter your SMTP settings, it is advised that you select Mail Use TLS and Port 587 for safer email communication.
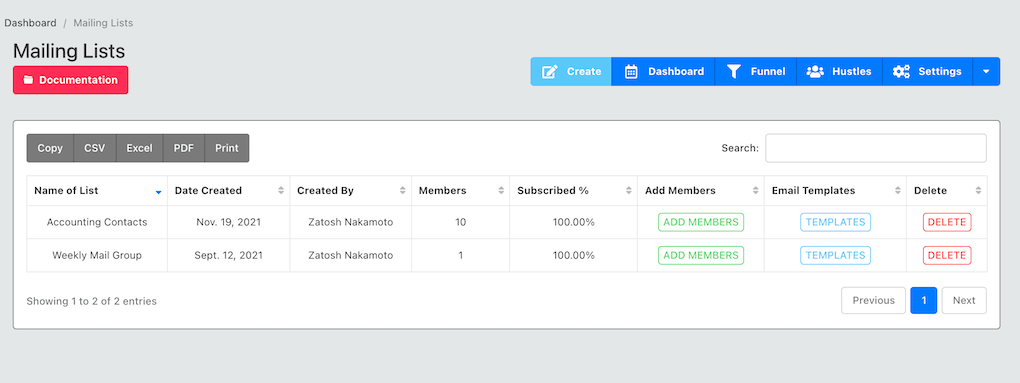
# Email Marketing Contact Groups
Before you can get started with sending marketing or group emails, you will need to create the contact groups. Contact groups are groups of similar contacts that you would like to send the same emails. Within a sales department, you could have market segments or departments that require you to send different emails to different people.
To get started navigate to the Email Contact Group Page (opens new window) here.
Click the "create" button at the top of the page to create a new contact group.
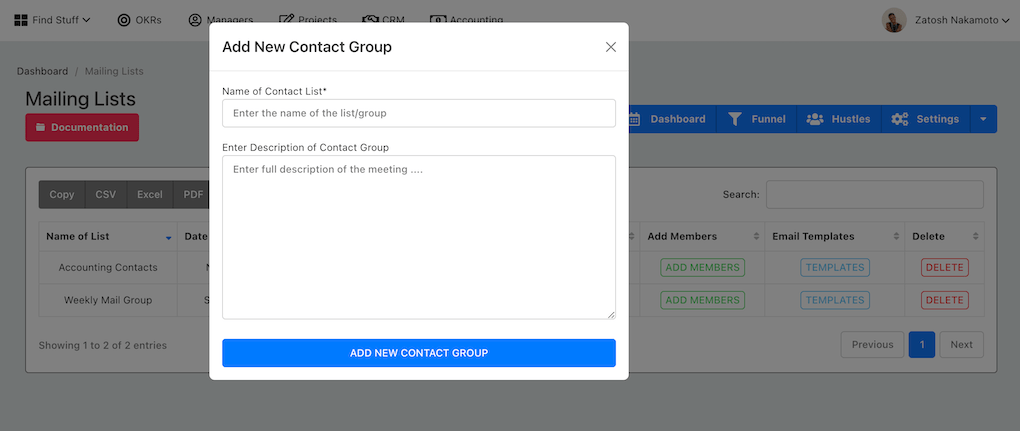
Add a suitable Name for the contact group, so you will be able to identify it from a list. Then add a suitable description for your records, so all the other team members who come across this list will know the purpose of the list. When you are done, submit the form and a new list will be created.
# Contact Group Actions
From this table, the following actions are available:
- Ability to add members to the contact group
- View/Interact with email templates for this contact group
- Delete a contact group
# Contact Group Table Metrics
From the contact group table you can view the following metrics:
- Number of contacts in the contact group
- The subscription percentage of that group
TIP
Every time someone unsubscribes from your emails the subscription percentage will be updated. By law the "unsubscribe" button is included in all mails sent out from Skhokho. The user email address will remain in your list, but emails will no longer be sent to them from the system.
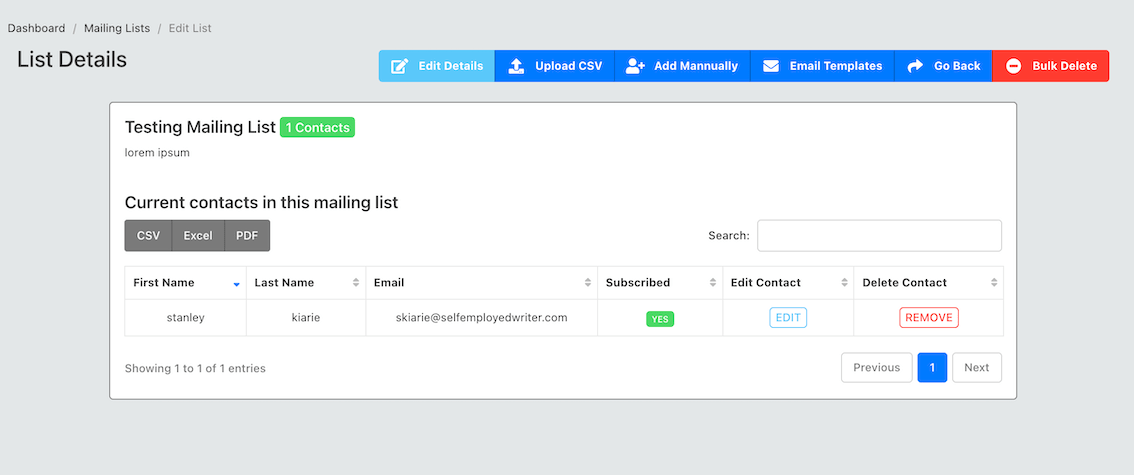
# Add Members to a group
To add members to a group, click on the "add members" green button on the same row of the group that you would like to add members to. You will be navigated to this page:
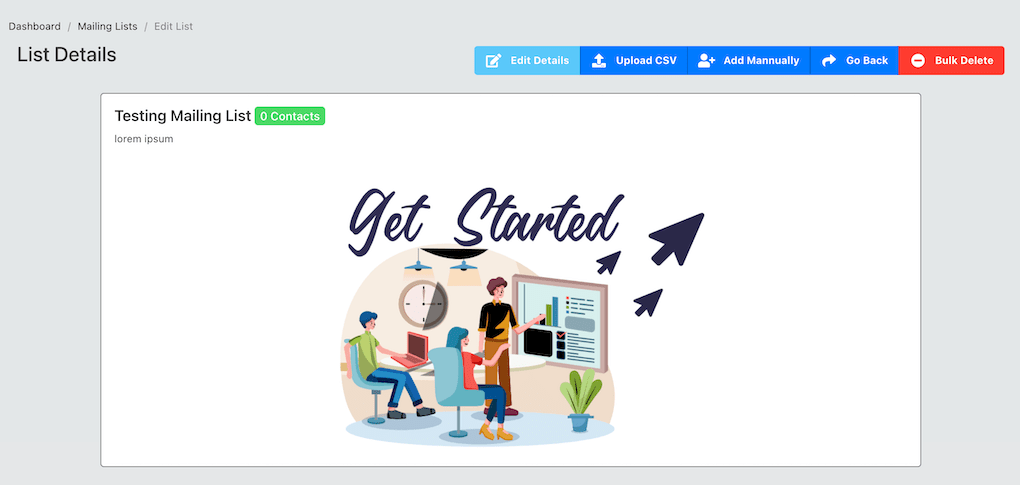
Your new email list will be empty, there are two ways to add members to this list:
- Add them manually by clicking the "add manually" button at the top of the page
- Upload a CSV file with contacts to this list
# Adding contacts manually
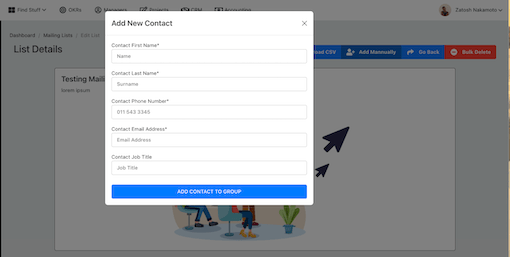
Enter the following information:
- Name
- Surname
- Contact Phone Number
- Contact Email Address
- Job Title
# Upload a CSV File
Before you upload a CSV file, you need to take note of the following specifications:
- The CSV file must have headings that match the required contacts (does not need to be exact, but the column headings must be there)
- Minimum columns should include a first name, last name and email address. The other fields can be left empty.
Click the "upload CSV" button at the top of the page, find the CSV file and upload it. You will them see this page:
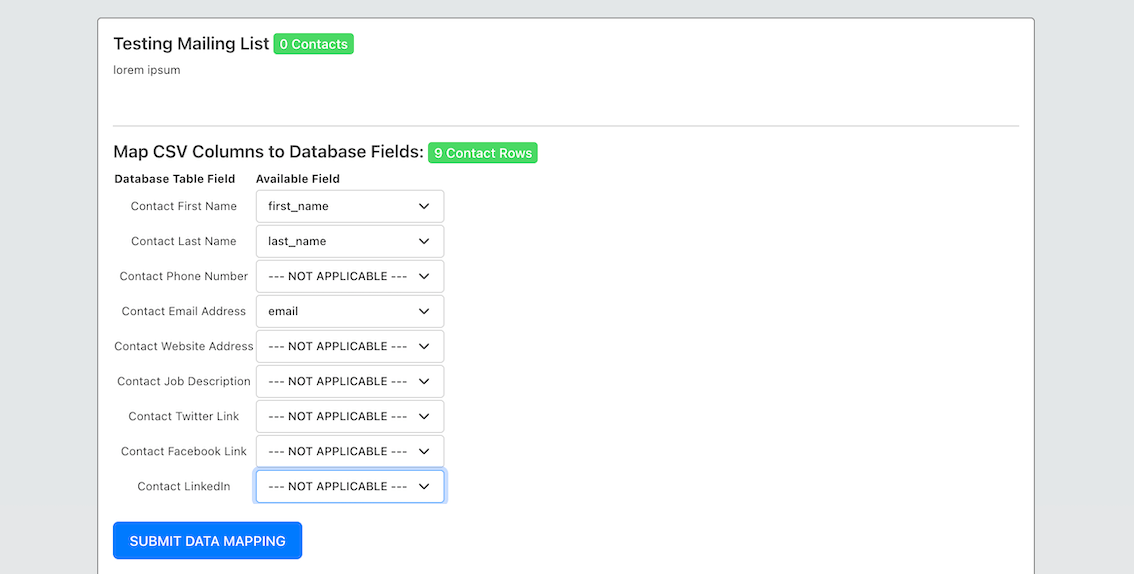
You must them map all the columns of your file with the required contact columns, as indicated in the image above. If a columns does not exist in your file you can select "---NOT APPLICABLE---".
When you are done, click "submit data mapping" to enter your contacts.
TIP
You might not see all your contacts at once, give it time as the task is running in the background. In addition you can return in future and upload more contacts, via manual method or CSV upload.
# Bulk Delete Contacts
At the top of the page, you can delete all contacts in a contact group by clicking the "bulk delete" button.
# Email Templates
There are two ways to access the email templates available for a given contact group:
- At the top of the detailed group page (as seen above)
- On the contact group list page (opens new window), in the table - under the "email templates" column.
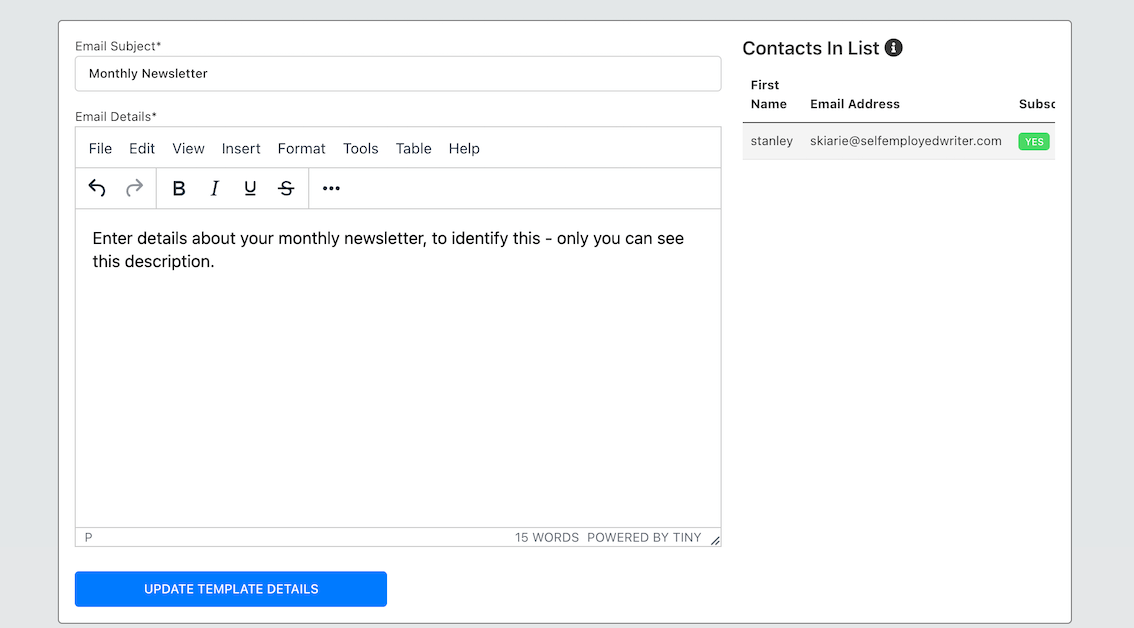
Click the button and go the the templates page. The templates page will look like this after you have added some templates, or will look empty when you get started:
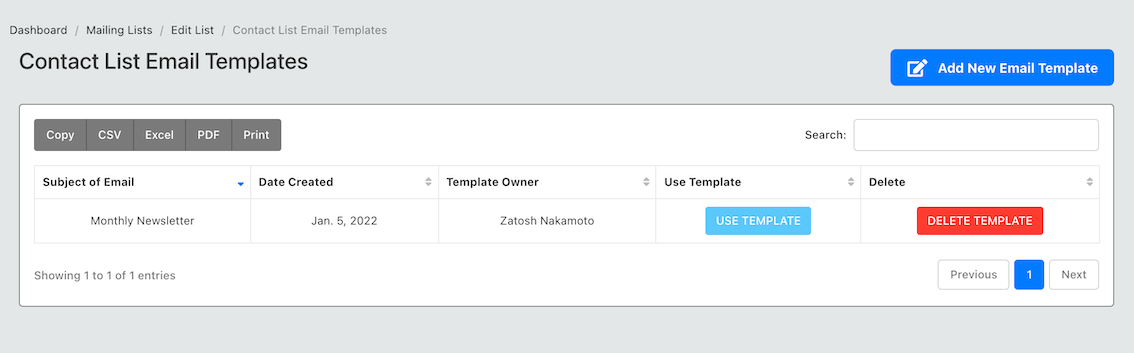
Create a new email template by clicking on the "add new template" button at the top of the page. Enter all the information required and submit.
TIP
You can get a sneak preview of members in this contact group as well from this page.
# Send an Email
From the email templates table, click on the RED button "use template" next to the template you would like to use.
You will be redirected to this page, where you have two options:
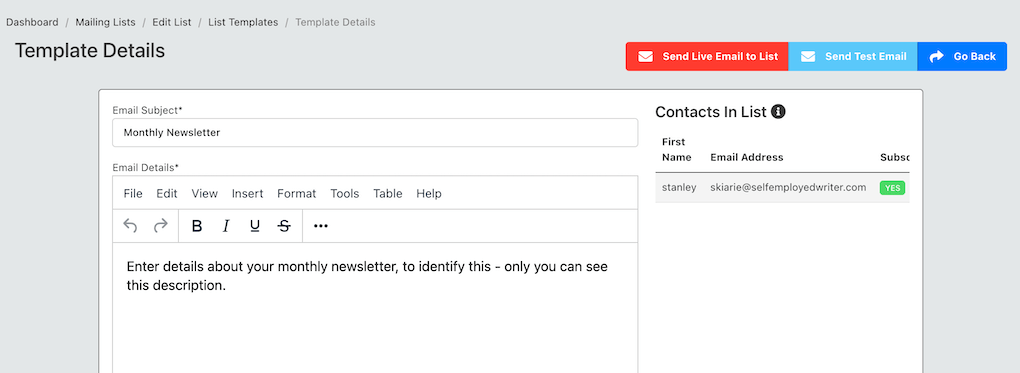
- Send a test email out - the email will be sent to your address as the logged in user, to test what the email will look like
- Send the email to all members of that contact group.
When you are satisfied, send out to email to all members of your group.
TIP
Please note, your email credentials you entered in the settings page will be used to send these marketing emails.